Logging In
Go to the following link: https://login.salesforce.com/
Enter your PCOM e-mail as the username and your password.
Once you are logged in, you may save the Salesforce “Home” page as your browser’s home page or as a bookmark, for your convenience.
Home Page
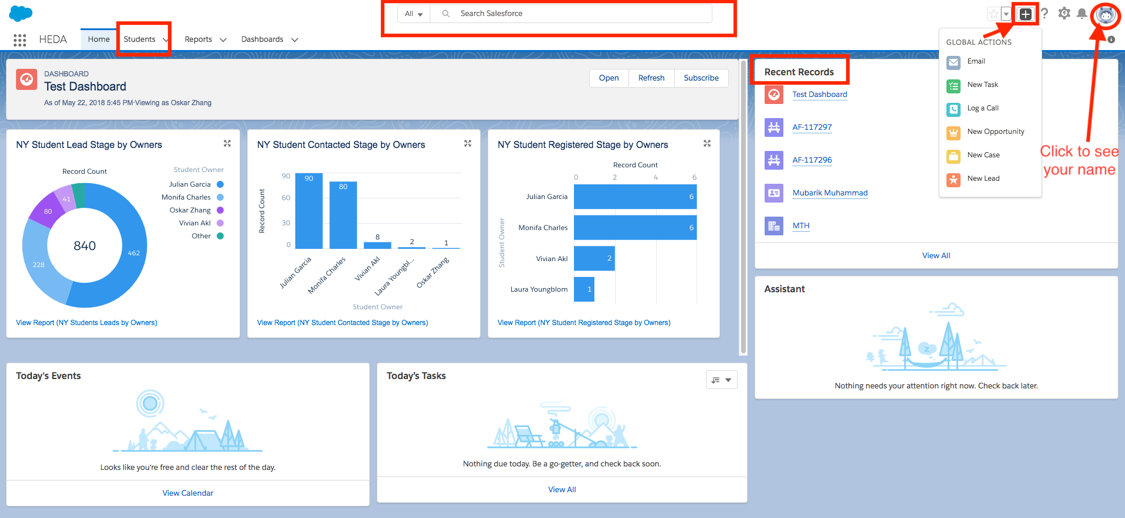
You will always land on the “Home” tab, immediately after logging in. Frequently Used Features (FUF) on this tab go as follows:
- Search Bar: At the top, you can use this feature to search for anything in Salesforce. You can search leads(students) by phone, number, e-mail or name (partial name spellings can be entered if they are followed by *). You can also search for reports.
- Your profile: At the top-right corner, this button allows you to access your profile and settings, as well as to log out.
- Global Actions: On the top-right (next to your profile button), this dropdown allows you to send an email and log a call to any of your student or create a new task for yourself.
- Recent Items: On the right, this is a list of recent lead(student) profiles, reports and accounts you have viewed.
Creating a Lead(student) Profile
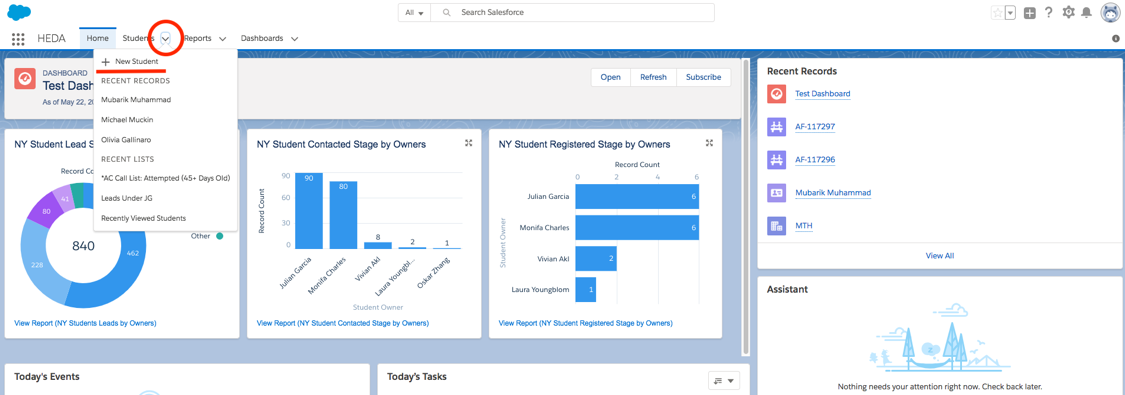
There are two ways to create a new student profile.
OR

Enter as much information as you have on hand.
For reporting purposes, all new leads should have at least these 7 fields entered:
First Name & Last Name
Note: If you don’t know one, you may enter * as a substitute
Student Stage: Please see *Stage Definitions
Note: All leads should be contacted ASAP. Even if the student doesn’t pick up or reply instantly, update the stage to “Attempted Contact”, then when you receive contact update to “Contact”, and so on and so forth. Update the Student Stage ASAP, every time it changes.
Program: Please see *General Overview/Programs
Note: On the rare occasion that you cannot get in touch with a student to find out their program-of-interest by the end of the month, please default to “MSTOM”.
Lead Source: Please see *Source Definitions.
Notes: You don’t have to enter “Most Recent Source Date”; the system will automatically update it when you press “Save”.
On the rare occasion that you cannot get in touch with a student to find out their lead source by the end of the month, please default to “Internet: Google/Self-Reported”.
Phone or Email: You need to enter at least one of these two fields.
Campus: Choose which this record belongs to.
Then, click “Save”. Now, you have a new lead profile.
Distributing
To distribute to a rep, click the icon next to the current Student Owner’s name. Search the rep and hit Change Owner.
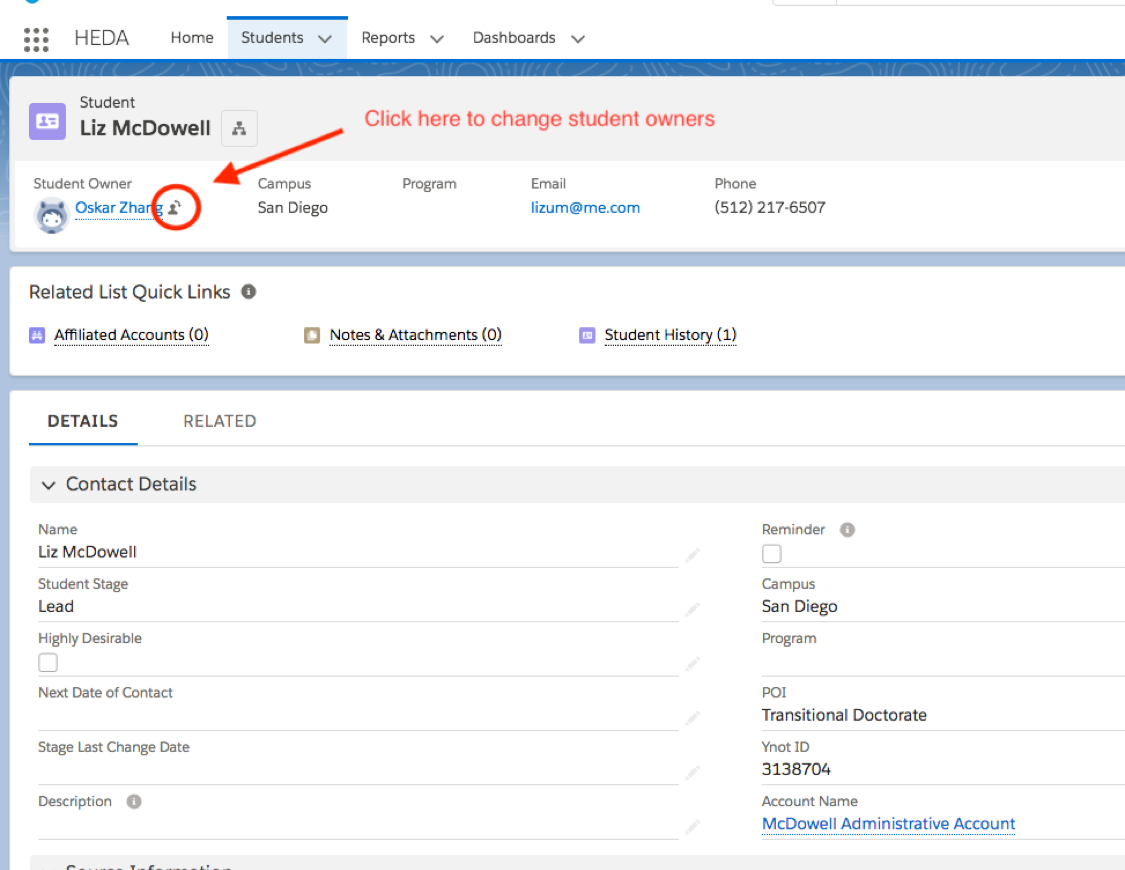
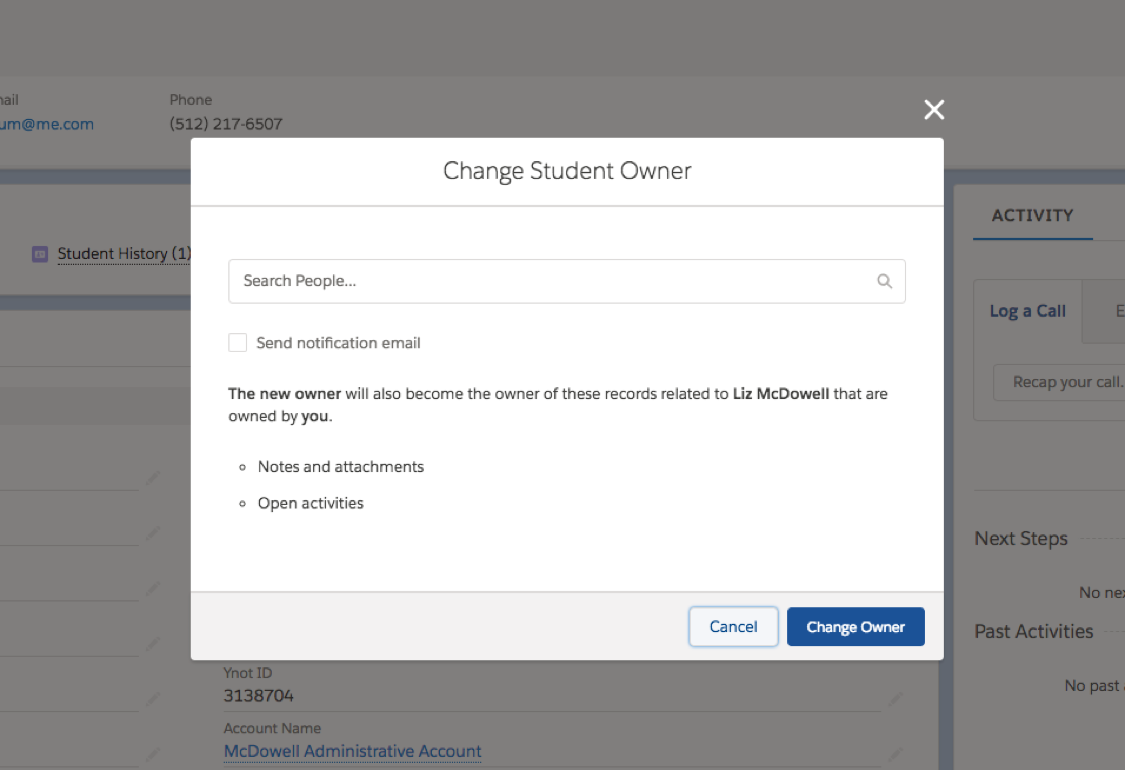
You do not need to check “Send Notification E-mail” if the lead is truly a new lead (“Student Stage” =Lead; “Most Recent Source Date” =Today). If they do not though, you MUST select this option, so the rep will be notified of the lead assignment.
Putting in Notes
Notes must be entered for every significant interaction or attempted contacted with a lead – whether the lead is yours or another rep’s.
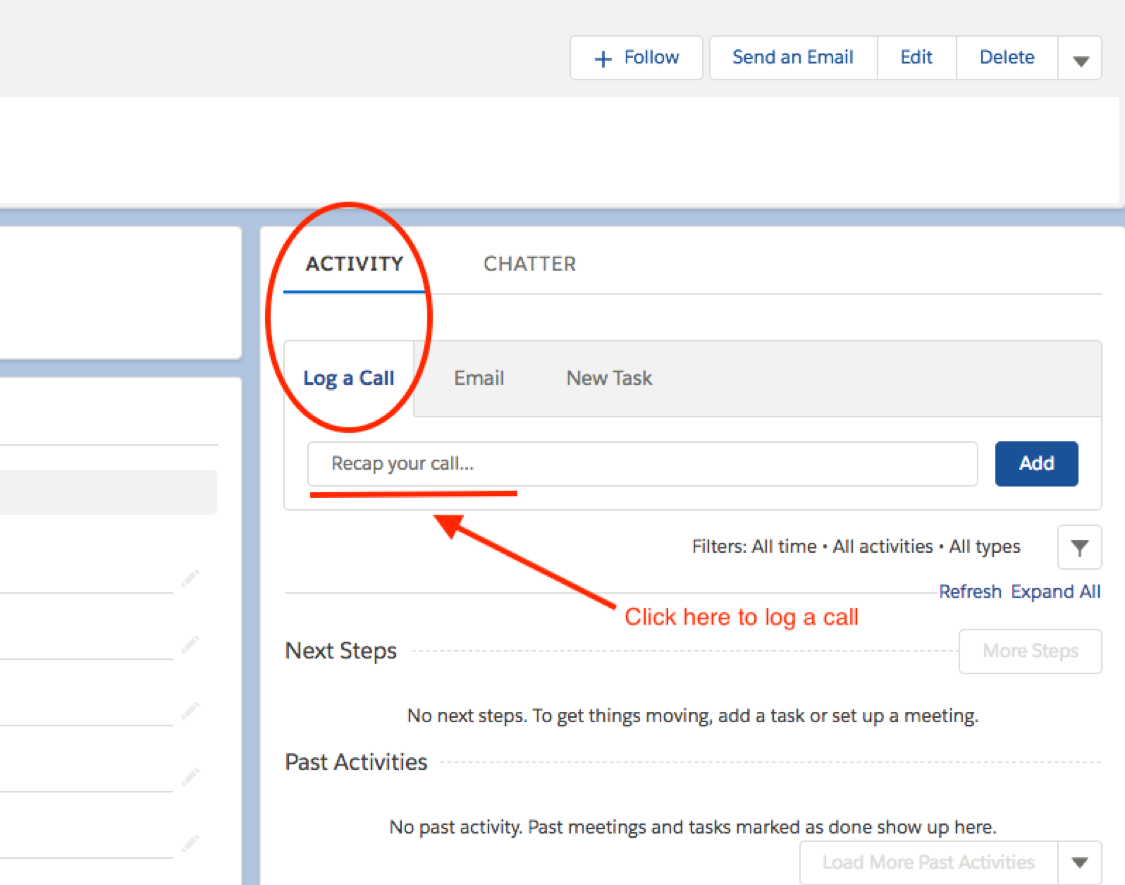
The quickest way to do this is to click “Recap your call” field under the “Activity – Log a Call” on the right side of the student page. Select an appropriate subject and any necessary comments. Hit Save. You’re done!
Notes During Call Campaigns (Power Hour, etc.)
If you’re on a call campaign and trying to call a long list of students, simply open up a tab for 10 students at a time, and as you’re calling each student, go to their tab and fill out the information under “Log a Call”. If no contact is made, hit save and move onto the next tab. If contact is made, put the appropriate notes from the conversation, hit save and move onto the next tab. This technique saves the most time and will allow you to get in touch with the most students.