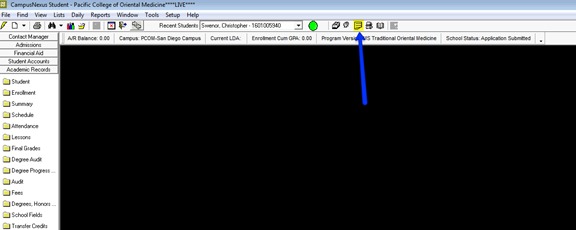
- Once you have selected students using the Search menu, click on the yellow Post-It Note Icon located on the right-hand portion of the toolbar.
- Once in the document center, click “Add Document.” This will allow you to edit the fields below.
- To select a specific document, click the drop-down arrow next to the Document Field. For this example, I will walk through adding a transcript for a student.
- You will then need to choose a document status. In the example of a transcript, we’re going to assume we’ve received the transcript via mail/email. In this case, I will choose “On File.” As you can see, we can also label documents in other ways, such as Requested/Required. You can choose certain labels for specific documents, as they relate.
- For On File documents, we also want to make sure we fill in the Date Received field. This is shown below.
- Once you have filled all appropriate fields, click the “Save” button, located in the lower right-hand corner of the menu.
Uploading a Document
- To upload a document into the document center, you will first have to scan the document into a PDF format. The easiest way to organize these files would be to place all your scans into a separate folder housed on your desktop.
- Once the document is scanned, open your document center and highlight by clicking the corresponding document in the Document Center. For this example, I will use the certification form. Once highlighted, the “Display Document” should become available to click on.
Click on the button. - Clicking the button will open another window. The upload button is the far left button (Upwards pointing arrow over a disk). Click this icon.
CS 8/26/16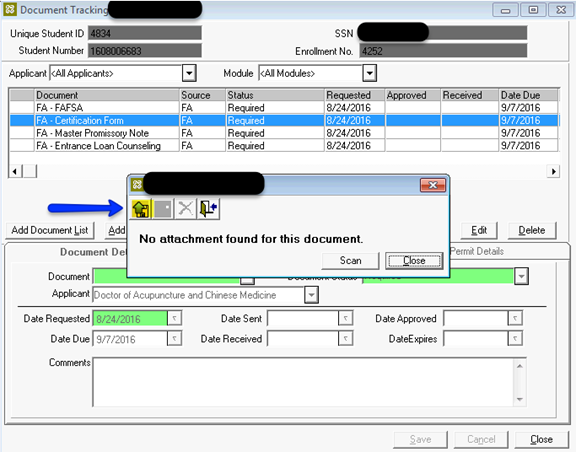
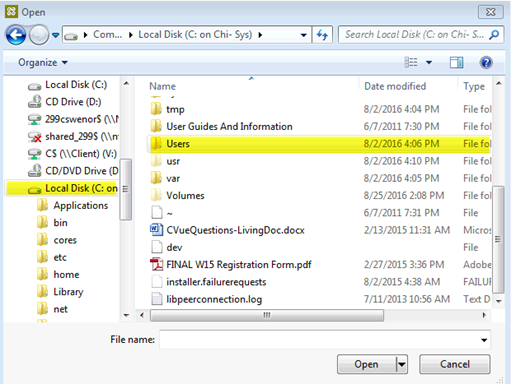
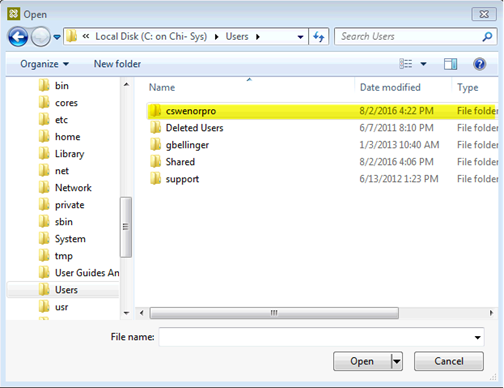
- This will now open another window where you can choose the file. *Note: A security window may pop up also asking you which level of access you need. If this occurs, please choose “Read and Write.” You will now need to find your desktop where the file is located. The pathway you will have to click through is the following: Under Computer on the left-most box, find Local Disk (C: on Your Local Computer Name -> In the right box, find “Users” and double click -> This will open up all the users associated with your computer. Find your user name and double click on it -> You are now reading the contents of your computer. Find the folder “Desktop” and double click -> Find your file and highlight it by clicking and then click open
CS 8/26/16
CS 8/26/16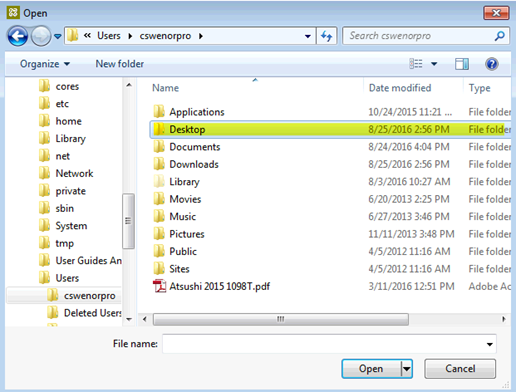
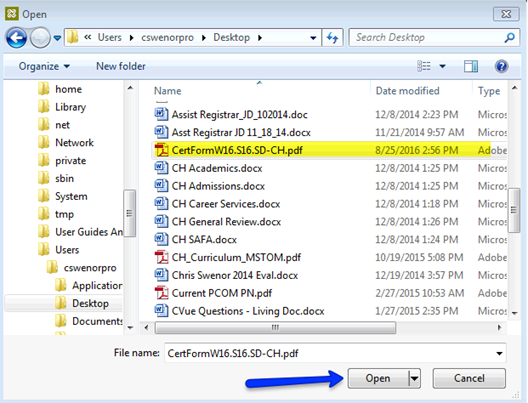
CS 8/26/16 -
After clicking Open, it will return you to the window discussed in Step3. The main difference is now you can see your file name attached.

-
To open the file, click on the icon with the Magnifying Glass over the Disk. This will open the file in CampsuVue and make it available for printing. When attaching files, please do not forget to mark the status of the document On File!
