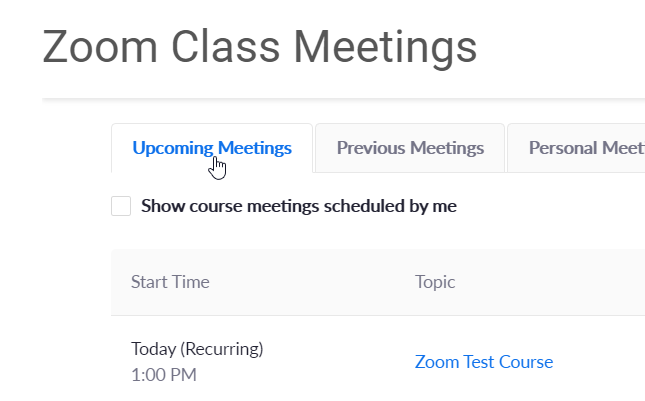
This article describes setting up class meetings, viewing attendance, and managing recordings.
Zoom Meeting Location
Step 1
Go to your course in Moodle

Step 2
Click the General Course Information section from the Table of Contents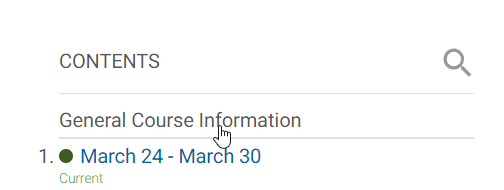
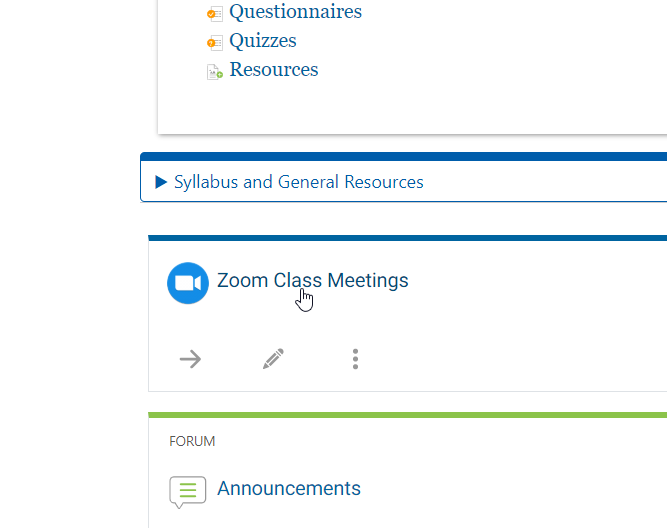
Step 3
Click Zoom Class Meetings
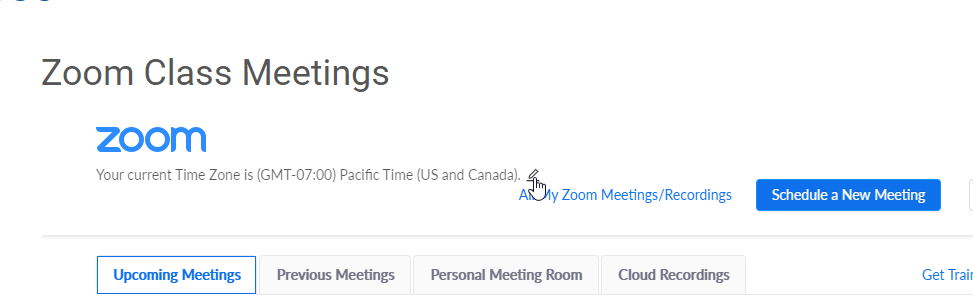
Update your Time Zone
Step 1
If your time zone is not correct, click the pencil icon next.
Step 2
Click the dropdown
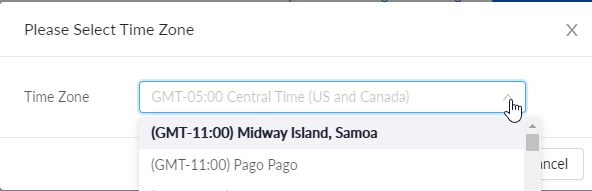
Step 3
Select your time zone from the list. Type into the field to narrow the list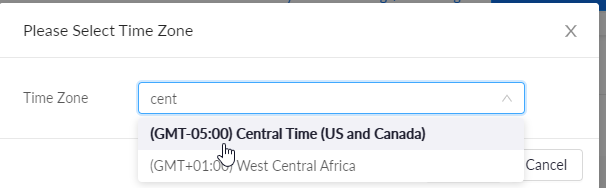
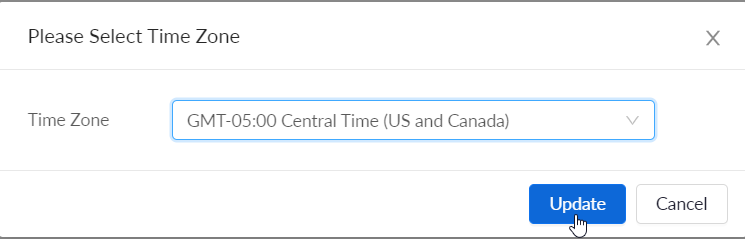
Step 4
Click Update
Scheduling Class Meetings
Step 1
Click Schedule a New Meeting

Step 2
Go to When
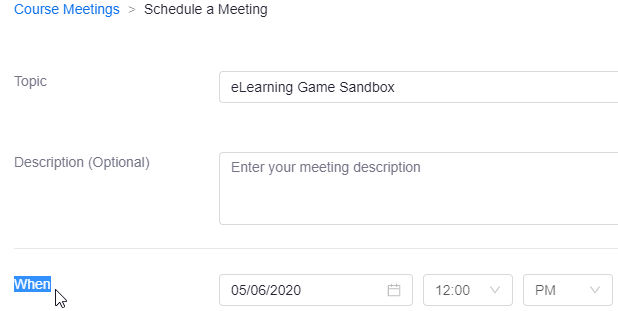
Step 3
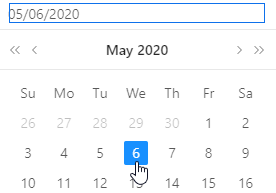
Click the date field.
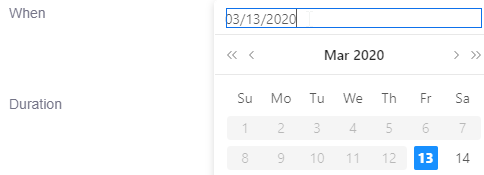
Step 4
Click the day of your class meeting
To go to the next month, click >
Step 5
Click the time dropdown

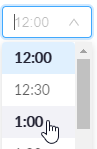
Step 6
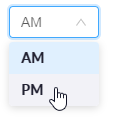
Click the time designation (AM or PM)
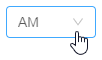
Step 7
Click the correct designation
Step 8
Double-check that the class meeting date and time are correct.
![]()
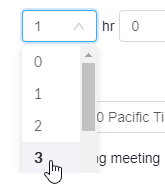
Step 9
Go to Duration and click the number of hours dropdown.
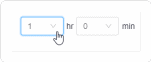
Step 10
Click the number of hours the class meets
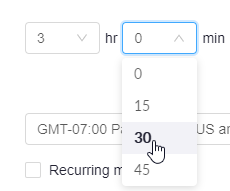
Step 11
Click the number of minutes dropdown
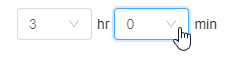
Step 12
Click the number of minutes on the hour the class meets
Note: Select the closest if there is not an exact match
Step 13
Go to Time Zone and check that the time zone for your meeting is correct.
![]()
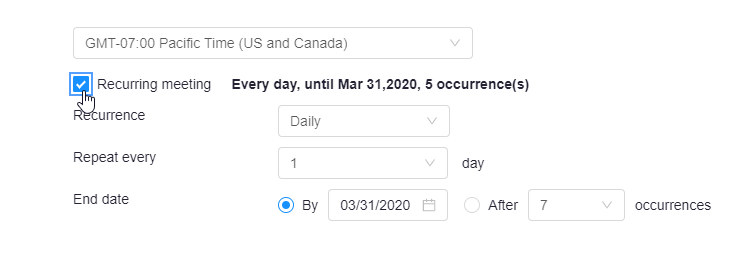
Step 14
Go to Recurring meeting

Step 15
If your class meets more than once, check the box
Step 16
Click the Recurrence dropdown
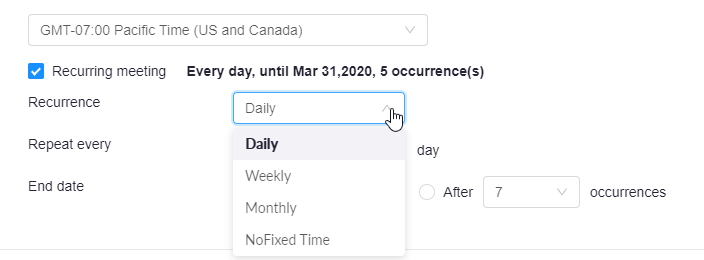
Step 17
Select Weekly (most common)
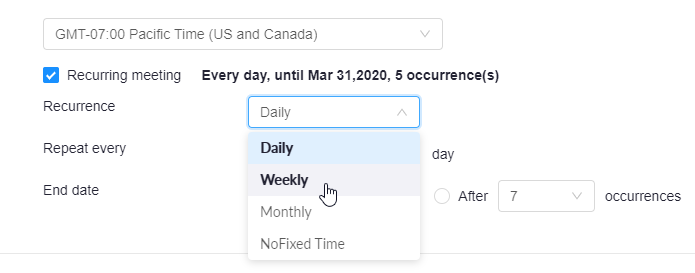
Step 18
Check the Repeat every dropdown is set to 1 week (most common)
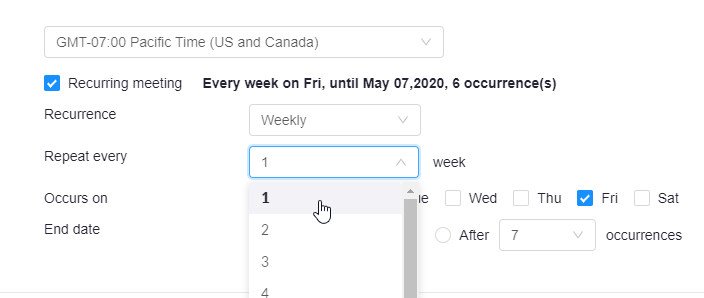
Step 19
Go to Occurs on
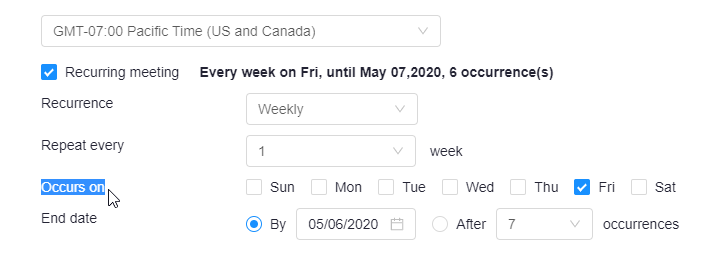
Step 20
Check the day(s) of the week the class meets and uncheck any day(s) it doesn't meet.
![]()
![]()
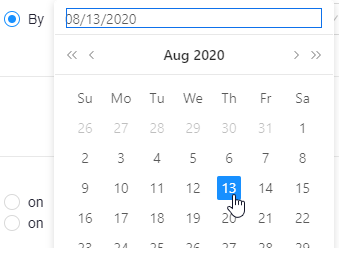
Step 21
Go to End date

Step 22
Click the date field
![]()
Step 23
Click the day after the last class meeting.
Step 24
Double-check that the Recurring meeting day, end date, and the number of occurrences is correct.
Note: if your class has any skip weeks, the number of occurrences will include skipping weeks
![]()
Step 25
Under Security, make sure to select the Require authentication to join option.

Step 26
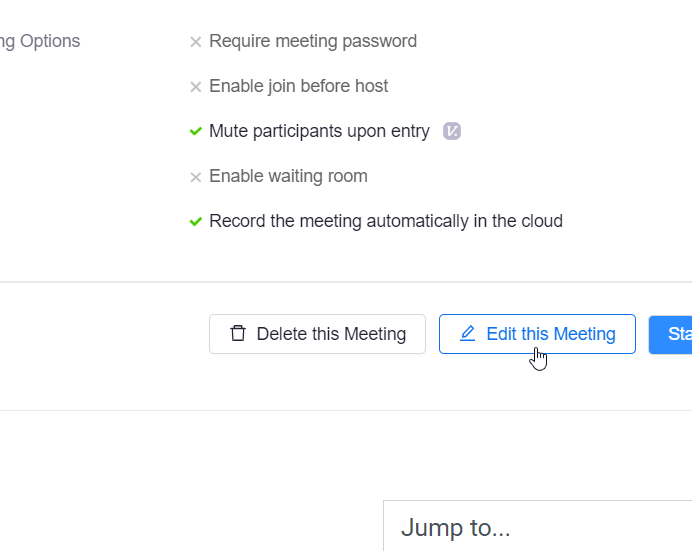
Under Meeting Options, make sure the following options are checked:
- Mute participants upon entry
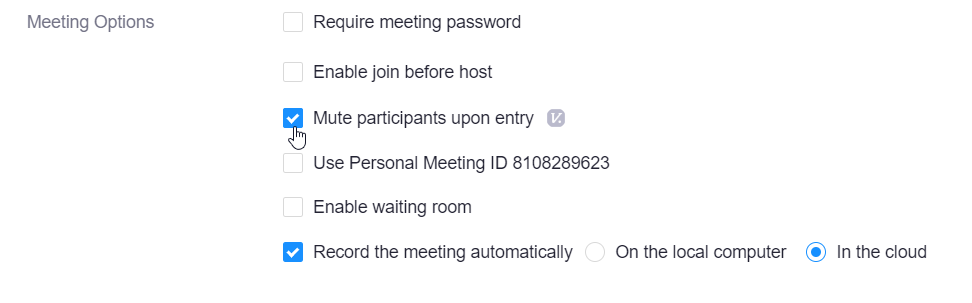
- Record the meeting automatically In the cloud
Step 27
If you are scheduling the meeting for someone else, click on Advanced Options:
- Search and select the person you are scheduling for
- If you want to add alternative hosts, enter the email address. 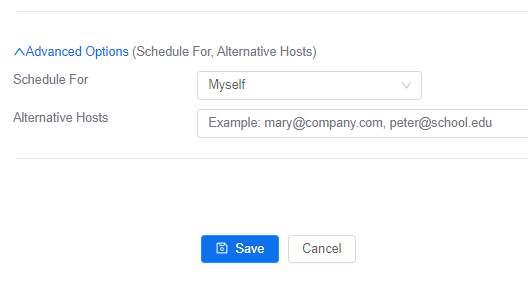
Step 28
Click Save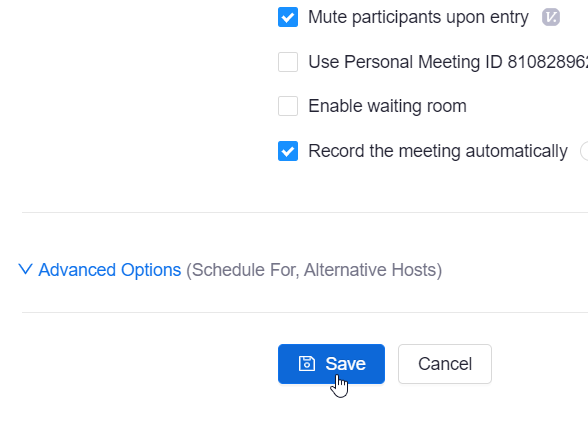
Add Occurrences or Update a Meeting
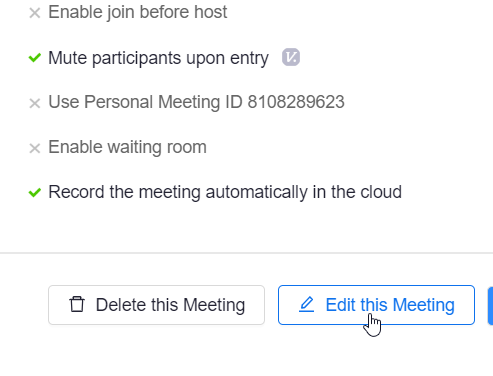
If you need to make any changes or need to add additional occurrences, click Edit this Meeting
Skip A Weekly Meeting
Step 1
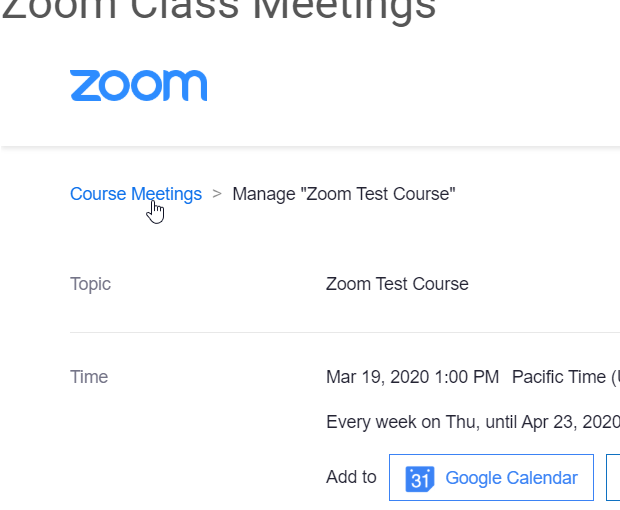
Click the Course Meetings breadcrumb
Step 2
Go to the Upcoming Meetings
Step 3
Find the date of the class skipped and click the Delete button.
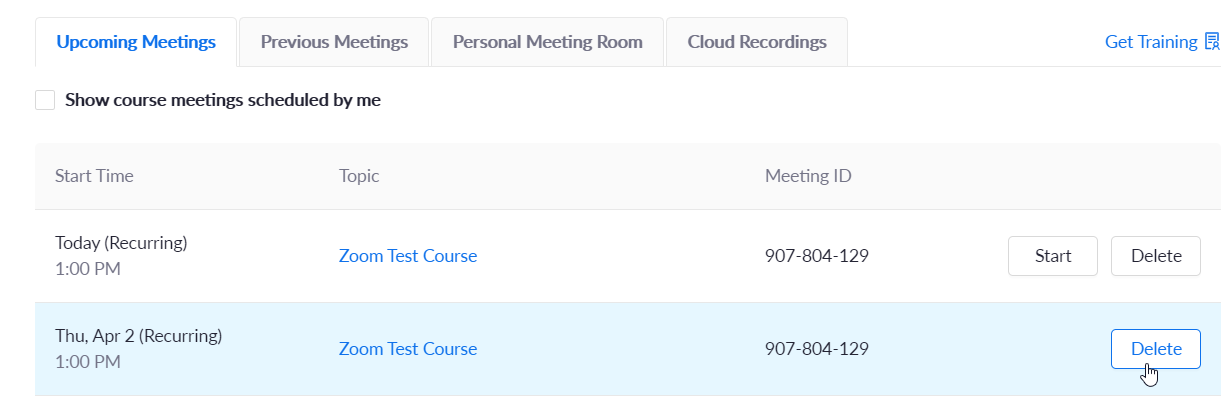
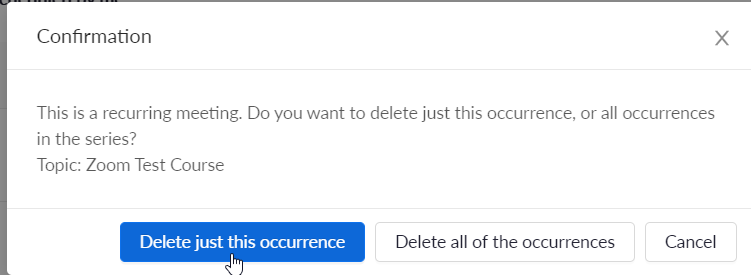
Step 4
Click Delete just this occurrence
Add Occurrence(s) to a Meeting
Step 1
If you need to re-add occurrences, click the Topic title of the meeting
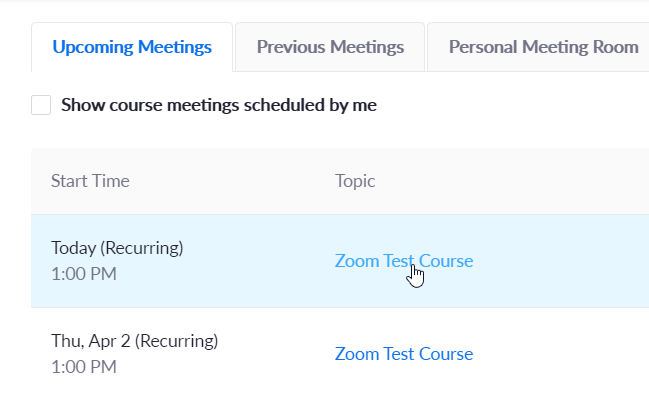
Step 2
Click Edit this Meeting
Step 3
Follow the directions in Schedule Class Meetings
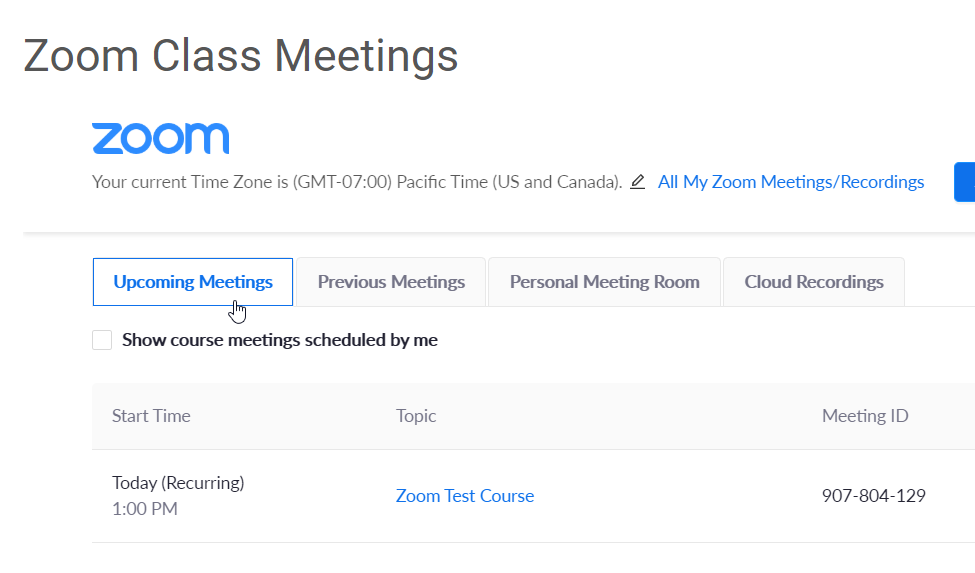
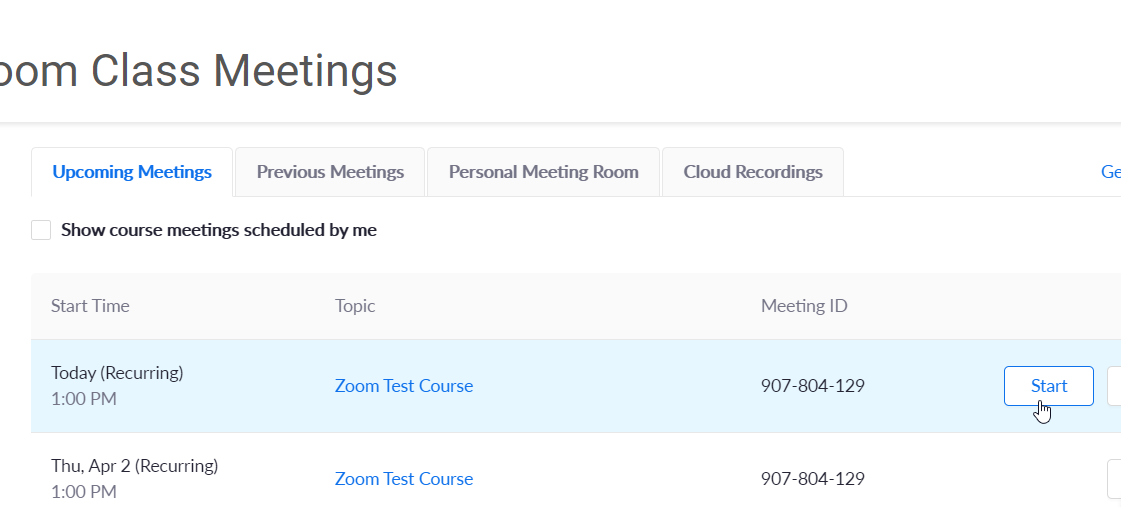
Start your Class Meeting
Step 1
Click the Upcoming Meetings tab
Step 2
Click the Start button
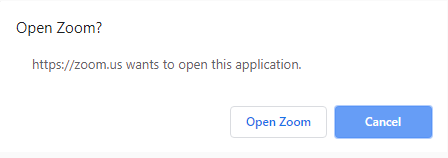
Step 3
Launch Zoom
Follow the directions for your browser to launch Zoom
Google Chrome
Click Open Zoom (PC) or Open zoom.us (Mac). You need to click this option every time you try to launch Zoom.
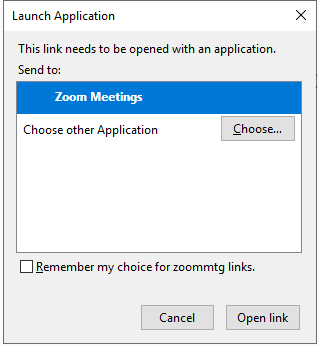
Mozilla Firefox
If this is your first time joining zoom from Firefox, you may be asked to open Zoom or the Zoom installer package. To skip this step in the future, enable Remember my choice for zoommtg links.
Click Open Link.
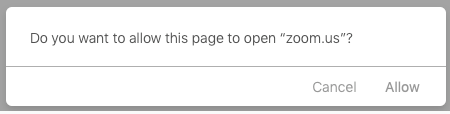
Safari
When asked if you want to open zoom.us, click Allow.
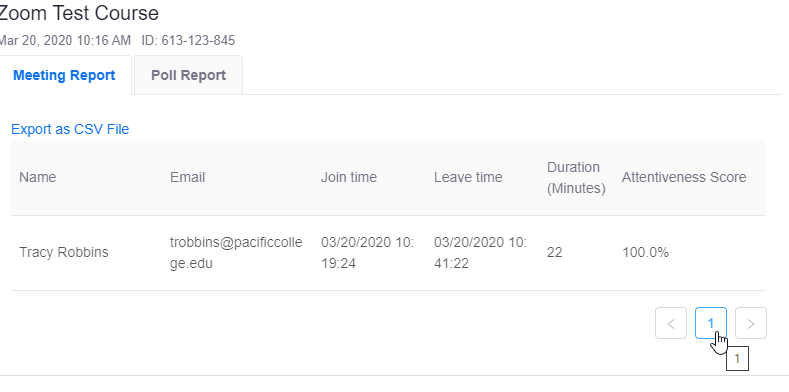
Attendance Reports
Step 1
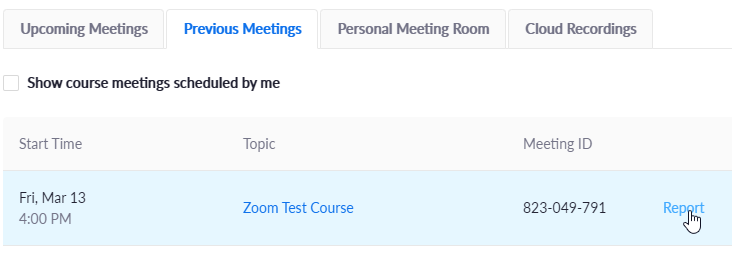
Click the Previous meetings tab
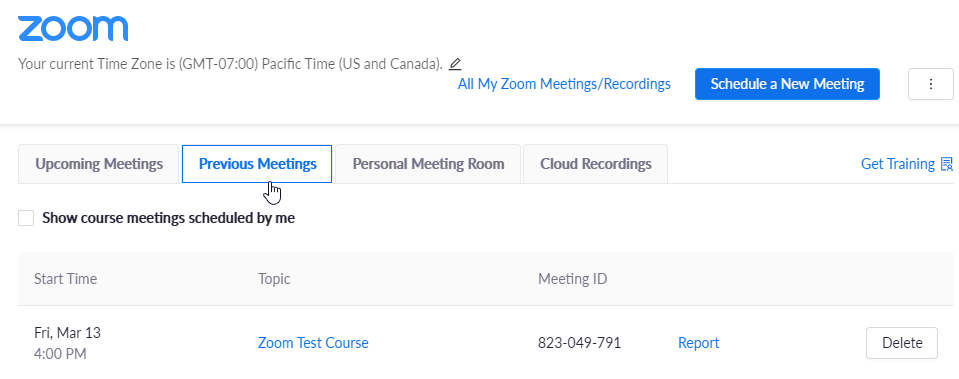
Step 2
Click Report next to the meeting that you want to see the attendance
Step 3
In the Meeting Report tab, you will see a list of attendees

Step 4
You may need to change the page at the bottom if you do not see a student on the list.
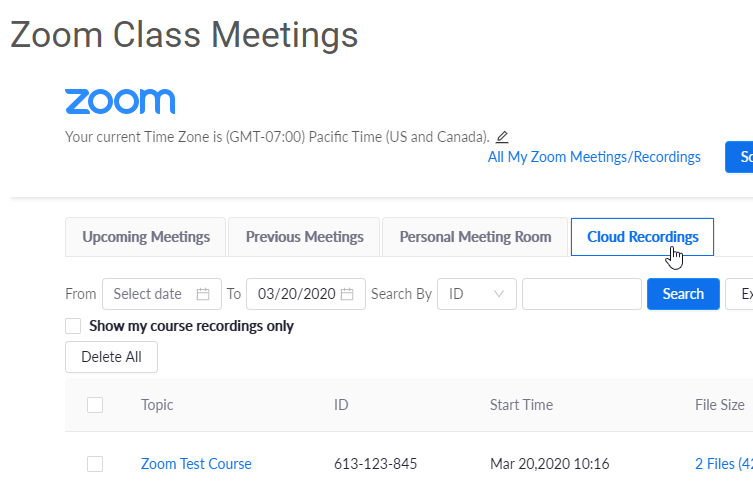
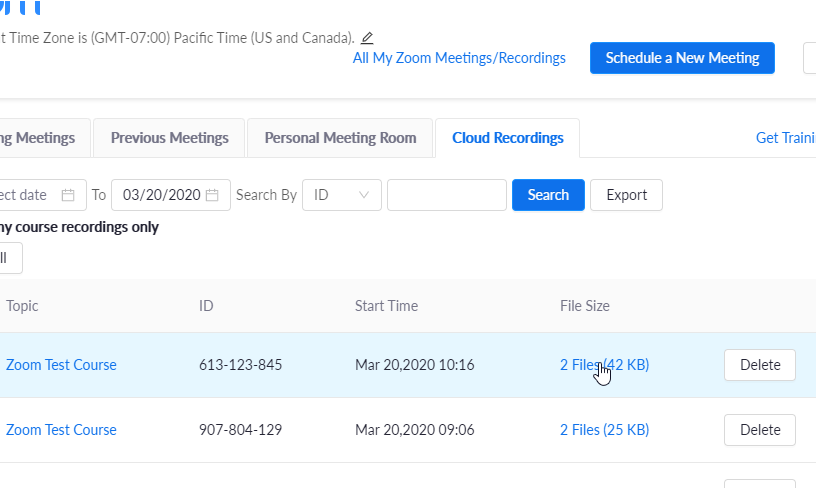
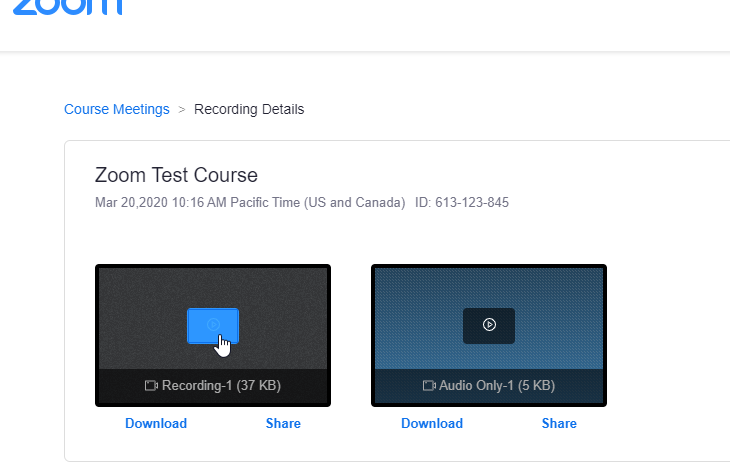
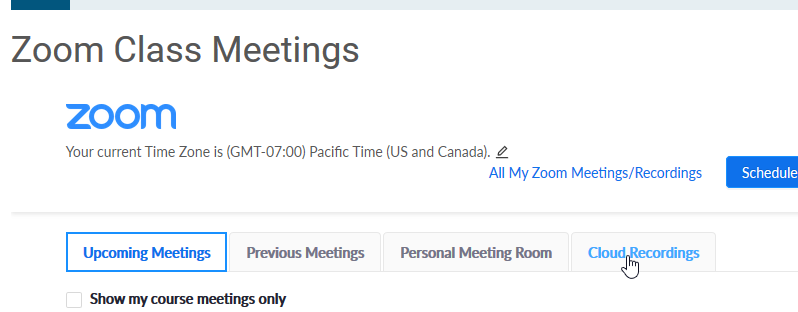
Class Recordings
Step 1
Click the Recording tab
Step 2
Click on the recording you want to see
Step 3
Play the recording by clicking the play button
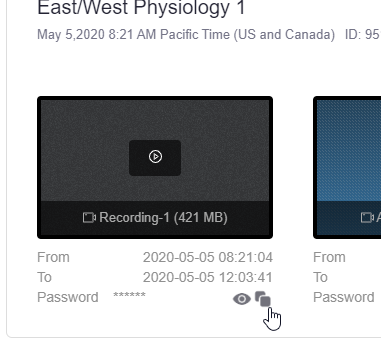
Step 4
A password will be copied to your clipboard automaticallyIf you have any issue with the password not automatically copying, you can go back to the browser tab to the left and see the password fields as in the image below.
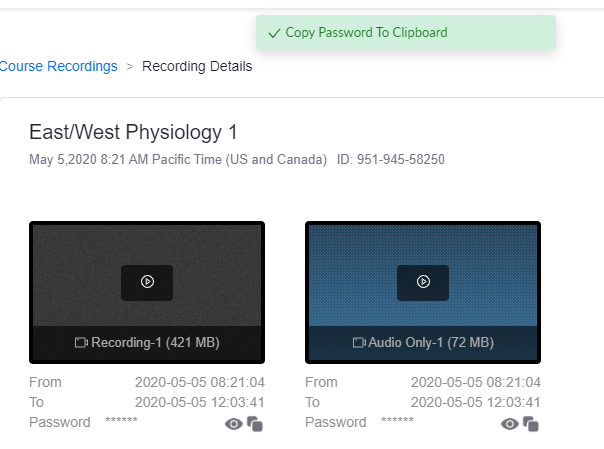
To copy the password manually, click the 'copy' icon
 Step 5
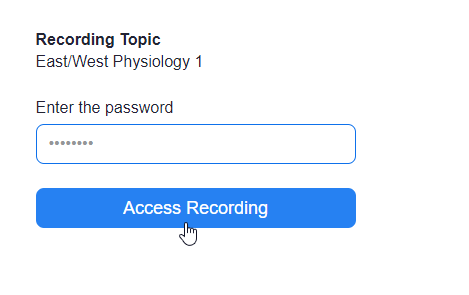
After clicking play, a new tab will openPaste the password in the field and click the Access Recording button
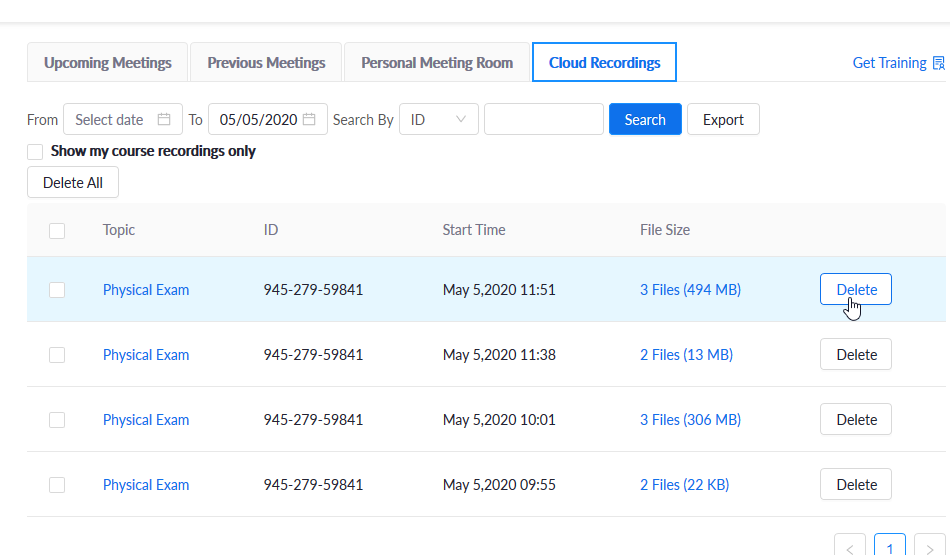
Delete a Cloud Recording
Step 1
Click the Cloud Recordings tab
Step 2
Click the Delete button next to the recording.
Viewing Chat Messages
Step 1
Click the Recording tab
Step 2
Click on the recording you want to see
Step 3
Play the recording by clicking the play button
Step 4
A password will be copied to your clipboard automaticallyIf you have any issue with the password not automatically copying, you can go back to the browser tab to the left and see the password fields as in the image below.
To copy the password manually, click the 'copy' icon
Step 5
After clicking play, a new tab will openPaste the password in the field and click the Access Recording button
Step 6
Click the Chat Messages tab
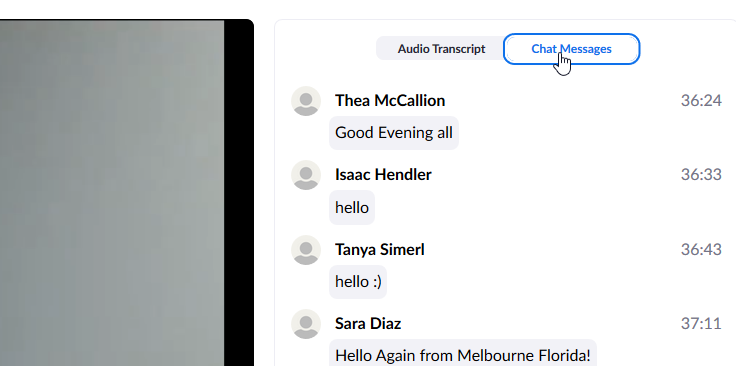
Step 7
Scroll or use the video controls to advance the Chat Messages. You must place a support ticket if you need to download a chat file.